New XSplit Gamecaster feature: Image Overlay
One of the most highly requested features of XSplit Gamecaster is the ability to add image overlays. Many users have been wanting to add their own custom logos or gameplay skins to personalize their streams or recordings. Well, that day has finally come and now you can add image overlays!
This blog post will be your guide on how to get started with the image overlay feature. The feature is available for all users to try, but to use a custom image you need to have an XSplit license.
How to use Image Overlays
First, you need to update to the latest version of XSplit Gamecaster v. 1.7. The feature will not be available in old versions of XSplit Gamecaster. Look on the Start tab of XSplit Gamecaster and you will be prompted if you are not on the latest version.
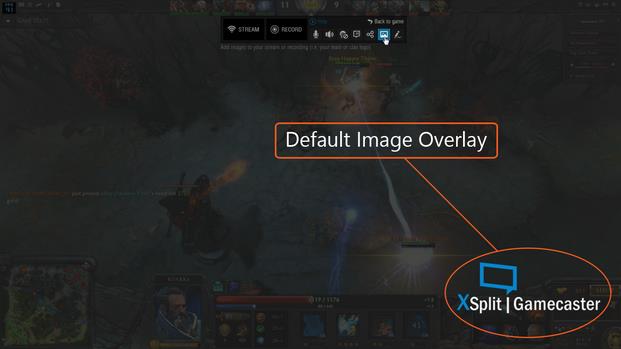
Once you have updated XSplit Gamecaster, launch your PC game (or open the console viewer) and open the XSplit Gamecaster overlay. You will notice that there is a new icon in the overlay menu. Click this icon to activate Image Overlay.

Once activated, your image will initially be the XSplit Gamecaster logo:
In the next section, we will show you how to change and adjust the image. Now that you have activated the Image Overlay, hover over it with your mouse to see the image toolbar (it will appear either above or below the image). The icon on the far right (shown in the image below) lets you change the image.
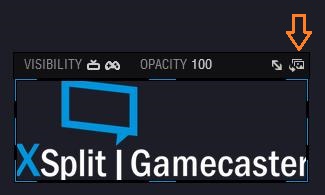
Click on this icon and a window will open.
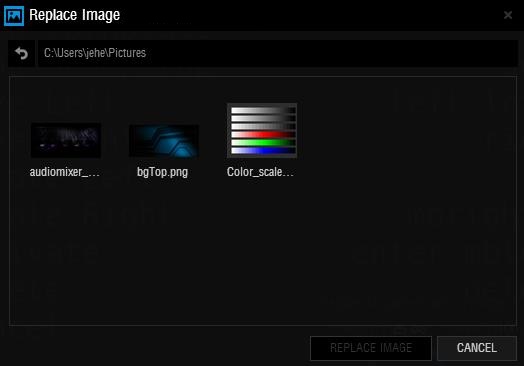
From this window, you can choose your preferred image overlay as you would when going through Windows Explorer. When you’ve selected your graphic, click on the ‘Replace Image’ button or double-click on your selected image.
Please note that you can only add one Image Overlay. If you would like to display multiple items like social media, logos, or sponsors on the image, we recommend you combine these various items into one image using image editing software.
The Image Overlay Toolbar – Adjusting the Image
When you click on your chosen image, an outline will appear with various highlighted sections that you can use to resize the image. You can re-position the image by dragging the image.
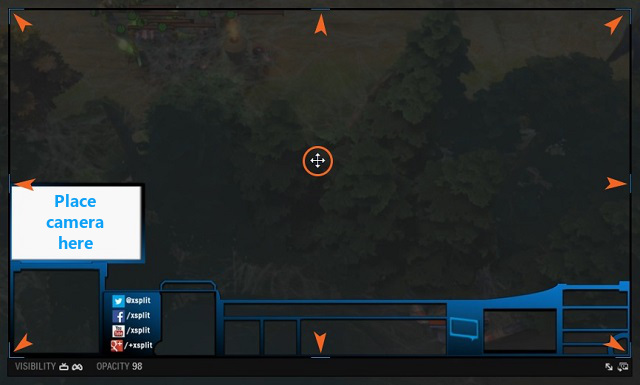
Let’s look at the toolbar of the Image Overlay.
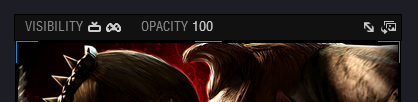
Visibility: The first option toggles visibility modes for the image. You can chose whether to show the image to your viewers and/or yourself. If you don’t wish to see the image while playing your game, toggle the “In-game HUD” to off.
Opacity: This controls the transparency of the image. A value of 100% means no transparency.
Aspect Ratio Lock: The third option (the arrow) toggles image aspect ratio lock on/off. Usually you want to keep this ‘on’.
Congratulations! Now you’ve setup your image overlay! You can easily turn off/on the Image Overlay using the button on the main XSplit HUD. We hope you enjoy this new feature and the continued evolution of XSplit Gamecaster!
If you have a cool image overlay, why not leave a comment below and share it with others.